
Creating My First NFT.

Dear Subscriber,
In today’s newsletter, I’ll take you through the process of creating my first NFT. As explained in a previous newsletter, an NFT can be defined as follows:
A Non-Fungible Token is simply a digital asset or token which represents items such as real estate, art, music, games etc. It is a digital certificate or receipt indicating digital ownership of the said item. According to Ayush Verma of Ipleaders, “the word fungible in NFT means something which is replaceable by another identical item. Therefore, non-fungible tokens are those tokens that aren’t replaceable with another non-fungible token. We can see this differently: each token is different, unlike other digital currency or actual currency, which holds identical value if replaced by the same amount.” So for example, one Bitcoin can replace another Bitcoin. However, an NFT cannot replace or be exchanged with another NFT.
For more information of what NFTs are, click here and here.
Following my research on NFTs, I was eager to create mine. However, I had a list for what I wanted in creating mine.
Artwork: Although several things could be converted to NFTs, I decided to go for my own artwork because I got into painting a few months ago and have some paintings under my belt.
Software to convert my physical art into digital art.
A user friendly NFT platform.
No fee required at the point of uploading art onto platform.
I already had my artwork of choice.
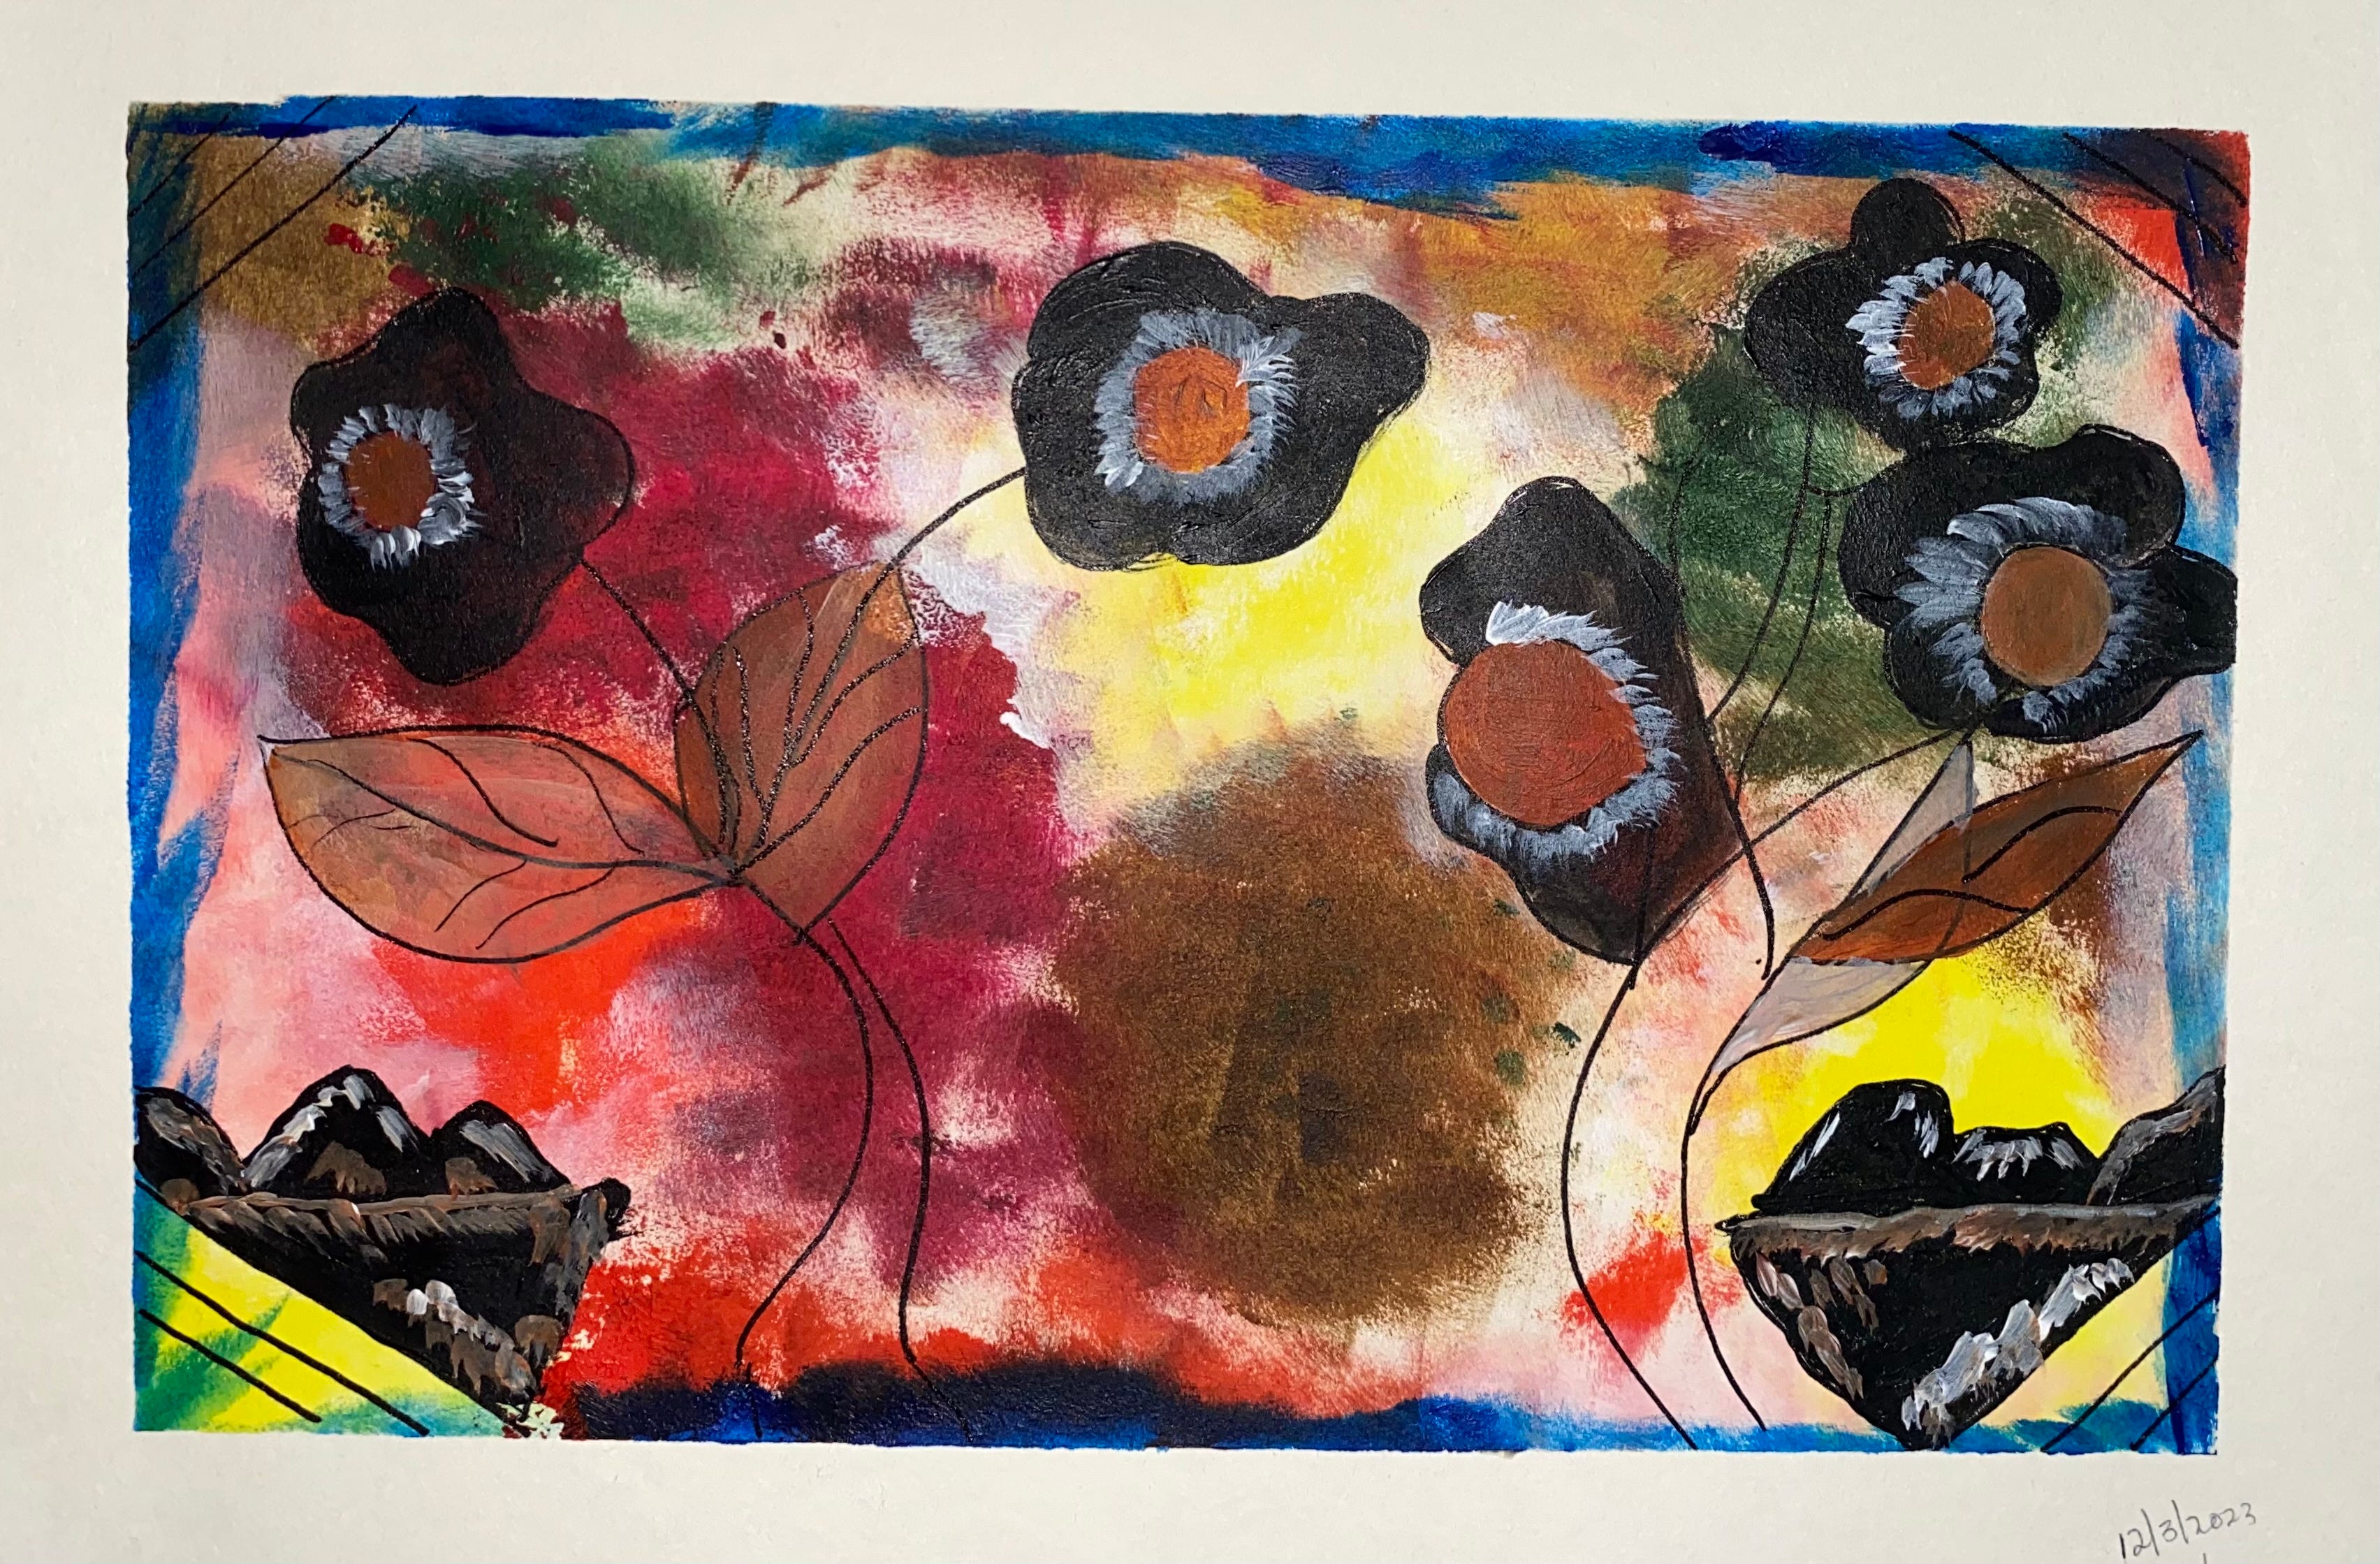
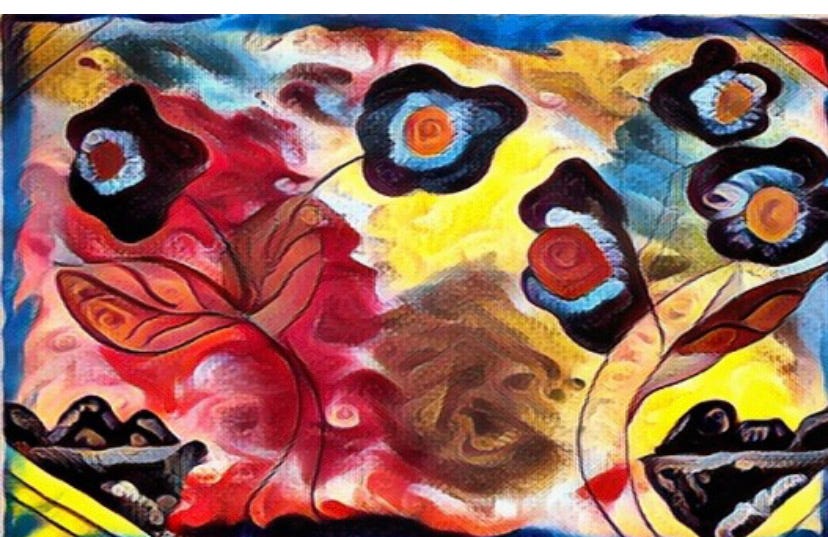
Following some research, I then came across Fotor NFT Creator which I used to turn my physical art pictured above, to a digital style artwork for an NFT. I must add here that this newsletter is not sponsored. I accessed the links and generally enjoyed the process.
Next up, I had to consider what platform to use. There are many NFT trading platforms such as Nifty Gateway, Foundation, OpenSea, Rarible etc. I was then faced with finding a platform that allowed creators to upload their NFTs for free. An article by Creative Bloq was very helpful in this process. In that article, Rarible was suggested as the platform that I could use to achieve my goal.
So, I setup an account with Rarible and followed instructions throughout the process including linking my crypto wallet (via MetaMask). After everything was set up, I uploaded my NFT, set a price and time period for sale.
And just like that, I successfully created my first NFT for sale.
You can click here to check it out.
 | A guest post by
|